Also available in:
![]() Ελληνικά
Ελληνικά
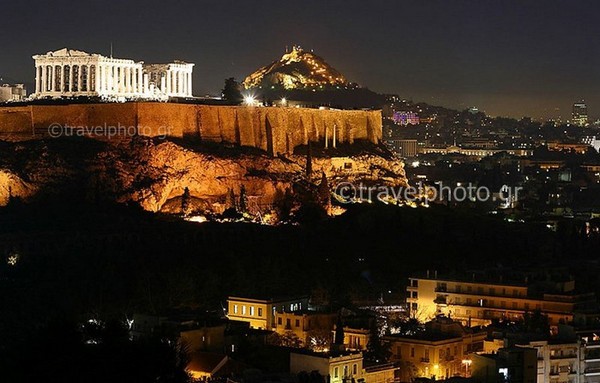
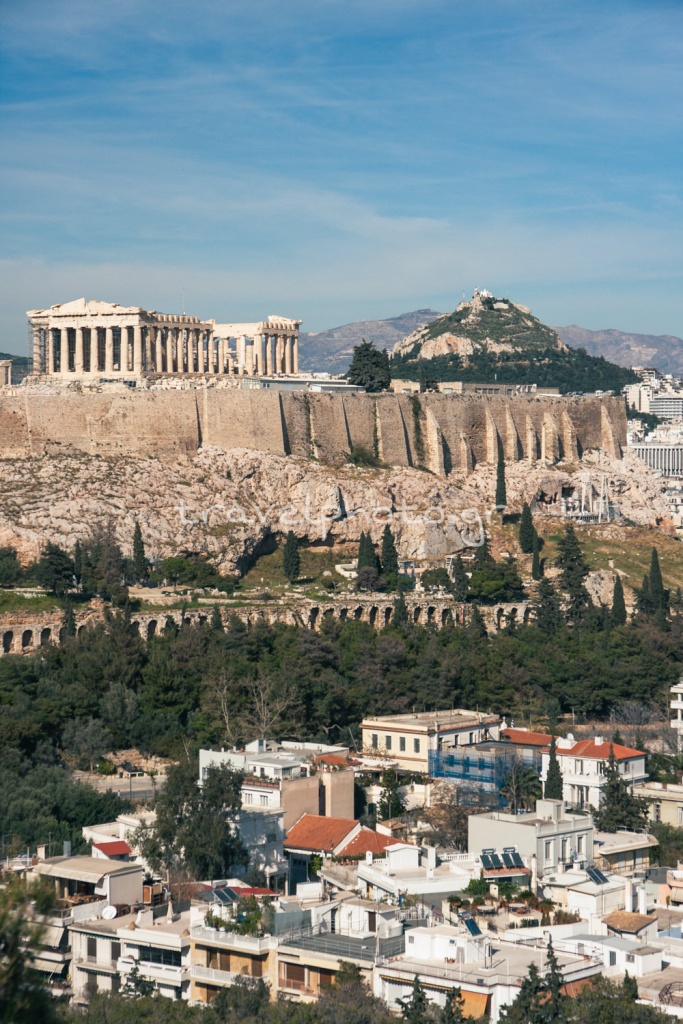
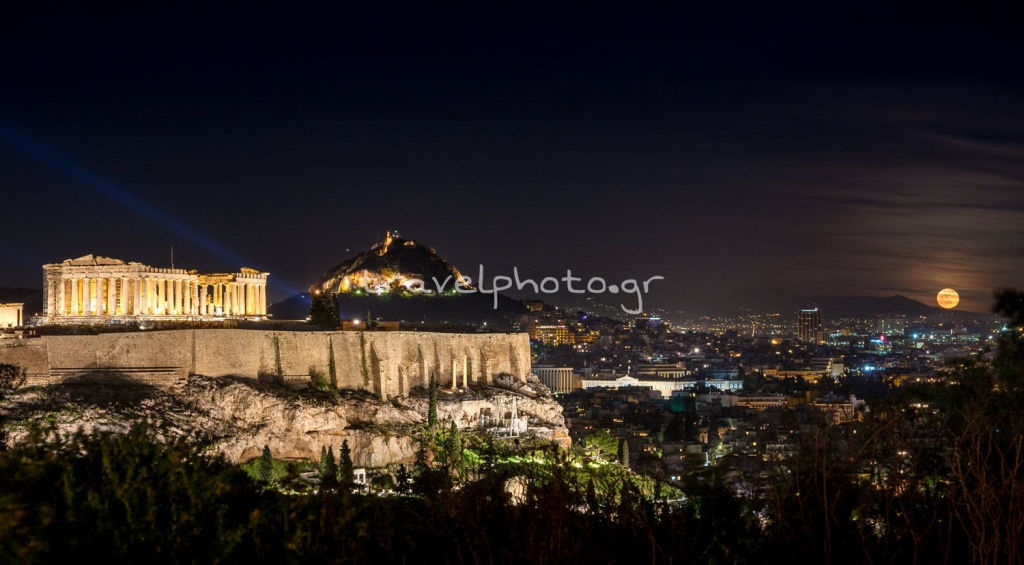
The technique of creating a video by taking multiple photos from a few hours to several days, depending on the subject, is called time lapse photography and was the subject of several tests that we did with the Acropolis of Athens in the now distant summer of 2011. In the video below you will see what happened in the Attic sky, the city lights and the lighting of the Sacred Rock of the Acropolis and the Parthenon from 6 in the afternoon until 9:40 in the evening.
See the final time lapse video
Technical details and basic equipment
To create the time lapse video below, 2,137 photographic shots of the exact same frame were taken. But how did this number come about? Depending on the subject matter, we have to take successive shots at regular intervals. If it’s clouds this interval can be 10 seconds. If it’s about the opening of the leaves of a flower, where the change in frame becomes less frequent you can take photos every half an hour or an hour. It always depends on your subject and how slow or fast the changes in the scene evolve in the final video.
Note here that you will need a good steady tripod, since you are not allowed to move the camera from the air, and a remote timer, the tool where you tell the camera when to start shooting (you can set up the camera somewhere and it will start taking pictures after 1:30 hour exactly) and every time it will be taken (e.g. every 5 seconds). Nikon cameras (some models) I think have internal settings for time lapse photography so you don’t need the tool mentioned before. But on the Canon cameras I use there is no such internal “facility”, so I use the remote timer (Canon TC-80N3 Timer Remote Control) which you have to clamp it onto the tripod somehow so it doesn’t hover and shake all those times.
So I took shots of the Acropolis, the Attic sky and the lights of Athens (my frame), from the hill of Filopappou every six seconds. This very simply means that every one minute I took 10 photos. The final time lapse video was made at 24fps (frame per second) so for every one second of video, 24 photos are needed, taken over a period of 2 minutes and 24 seconds.
So for 1 second of video it takes 2’24” of time. If I now for example made my video at 12fps for every second of video it would take 1 minute and 12 seconds of shots every 6 seconds and my video would have twice the final time and half the speed of the movement of the objects, than in the 24fps video (the clouds for example would move at half the speed.)
Time lapse video with different brightness
For creating videos outdoors, the weather and time are very important factors. In the time lapse video of the Acropolis we have a transition from night to day. This seems to happen quite quickly and causes exposure problems that create the sudden changes in brightness of the final video (the phenomenon is called flickering).
It should be said here that we started the shoot by setting the camera to manual exposure with an aperture of f8 and a time to shoot in strong afternoon light. But as it was shooting, the brightness dropped dramatically at one point so I had to make changes every ten minutes or even less manually, increasing the shutter speed to let more light in naturally.
These changes as well as the infinitesimal touch on the camera can be seen in several parts of the time lapse video and would be even more pronounced if I didn’t use a special filter (mentioned below) that reduces and smoothes these abrupt changes somewhat.
Time lapse video and the flickering effect
So we come to the point of seeing what we can do to avoid the flickering effect. We can simply take photos during the time of day when we don’t have a strong fluctuation in brightness, as is the case with sunrise and sunset. If we decide to shoot either of these two conditions, or we happen to have bright sunshine at the beginning but towards the end of the shots we have heavy cloud shadows, then we can set the camera setting to auto exposure.
This option will produce several shots that have similar brightness ( e.g. 10 consecutive shots in one minute) with perhaps a slightly altered shutter speed. This has to do with the sensitivity of the camera’s sensor and the chances of something infinitesimal changing in brightness that will alter the “usual” shutter speed within that short period of time.
In a test I did on my balcony I saw that the effect in the final time lapse video is quite intense and annoying. But the good thing about the auto exposure option is that the final video is much easier to correct, in fact we get very good results using the special filter I mentioned above. So it’s worth trying it in scenes of big changes in brightness and it’s something I’ll be doing in my next attempt.
In closing, we would like to mention a tool that we have not tested in practice but that seems to do an excellent primary job in dealing with the phenomenon. It’s Little Bramper and it’s worth a look if you want to get serious about time lapse photography.
Programs for time lapse video
So after I mentioned the special filter it’s time to get more specific by talking a little bit about the programs you can use to create your own time lapse videos. Let’s start with image editing. (let it be said here that I’m not an expert in image editing and even more so in video editing so I’ll just mention what I’ve tried in practice or what I’ve read that works well with other users on various related forums)
Here you need to remember to make exactly the same changes to all your photos. This can be done by making the change in one and applying them to the rest. At Photoshop you will use Actions, in Lightroom the Sync feature and in Gimp (a free image editor) using an add-on. This step of editing your photos is not necessary, but it does of course help with the final look of the time lapse video.
The next step is to create the video from the hundreds or even thousands of photos you took. This is done with programs like Quick Time Pro, After Effects and several others that are not available for free though. But we found the MakeAvi that does a good job and is worth trying before going to a solution that costs money. Add photos to MakeAvi, set the fps, hit Begin, give new video location and name and choose some Video Compression so you don’t end up with a video file of some Gigabyte. I use the ffdshow video codec at 100% quality.
The next step if you notice the flickering effect in your video is to use the special filter we mentioned before. One of the free options we tried was the combination of VirtualDub (a free program for basic changes to video files) and the
deflicker or Graft filter. Try the default settings and if you have the time and inclination read the other possibilities from the help of each program.
Finally, the final editing with the addition of music and subtitles at the end was done with Corel VideoStudio Pro X3 which is not free but was pre-installed with my laptop.
Acropolis and Athens, time lapse video
See it in full screen and in 720p HD
Attention to your equipment
It is very important to remember that creating a time lapse video outdoors requires a lot of patience, good anticipation for the day and time you are going and of course vigilance at the point of shooting. This means that you cannot leave the camera on the tripod, go for 1-2 hours for coffee at Thiseio and return to your camera exactly at the time you have calculated because there is a serious possibility that someone else will enjoy the time lapse video and not only!
That’s why it goes without saying that you will be next to your camera during the shooting and in order not to get bored during these hours it would be good to take:
- a favorite book so you can be sure you won’t get bored in the next 3 hours,
- an mp3 player or
- just good company. Who will definitely understand that under no circumstances should you move the engine and the tripod while you are there. Not even out of curiosity…
Useful information sources for time lapse photography / video
For more useful information you can visit the articleby photographer Timothy Allen, a photographer for BBC’s Human Planet. In addition, detailed information can be found on Wikipedia
Leave a Reply